How to Schedule Screen Recording

Sometimes it might happen that you need to record something on your PC while you know that you won't be near the machine. In such a case you will need to initiate both the start and the stop of the recording process. Icecream Screen Recorder offers the opportunity to schedule the recording of a certain area that will begin and finish at the needed time. Check out the how-to guide below to find out more on how to do that.
Save the EXE file and install the program
Download Icecream Screen Recorder from the official website to make sure you have the latest version of the software. Execute the setup process of the file by first double clicking the exe file and then following the instructions given by the installation Wizard. When everything's set, open the program.
Open the Tasks panel
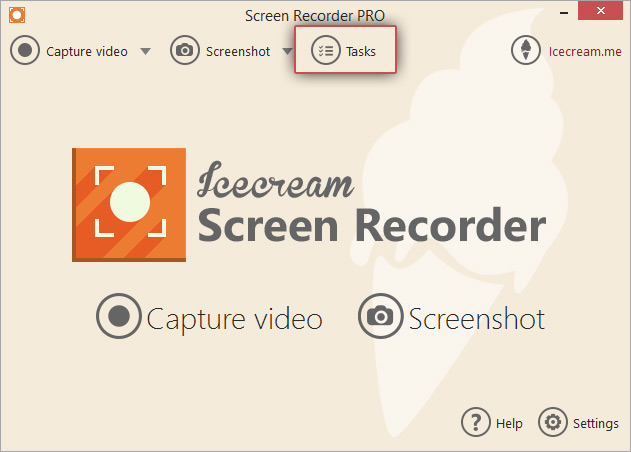
Click the “Tasks” button in the top of the program's main window to open the tasks panel.
Schedule the screen recording
Before you schedule the recording, please make sure you have sufficient free disk space to record the task successfully. To record 1 hour long video you will approximately need 1 GB of free disk space.
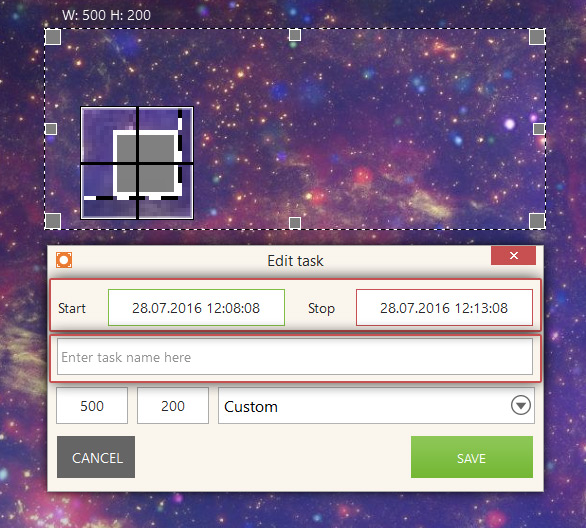
Click the orange PLUS icon in the circle to open to start scheduling the recording. Select the area to be recorded first. You may further one adjust the area through the newly opened panel: type in new custom resolution or select one of the preset ones.

Enter the date and the time of when the recording should start into the field colored green to the right of the “Start” sign and the date and the time of when the recording should automatically finish into the field with a red frame to the right of the “Stop” sign. Enter a custom title for the scheduled task if needed (if the name wasn't entered, the task will be named “Task #1”).
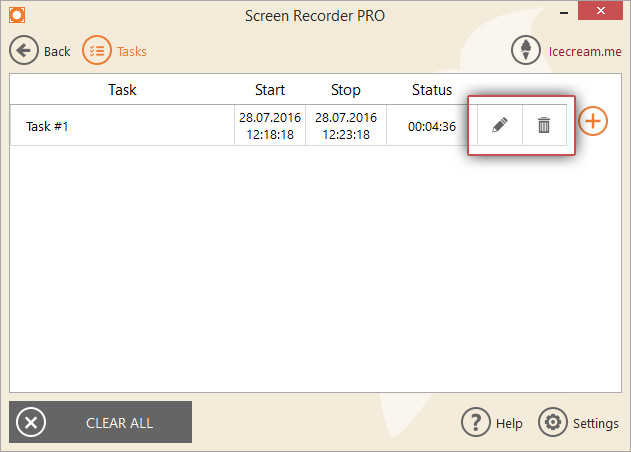
Before the scheduled recording starts you may click the pencil button to edit the task or recycle bin icon to permanently delete the created task.
When the finishing time of the task comes, the program will automatically create the video file and save it into the destination folder.
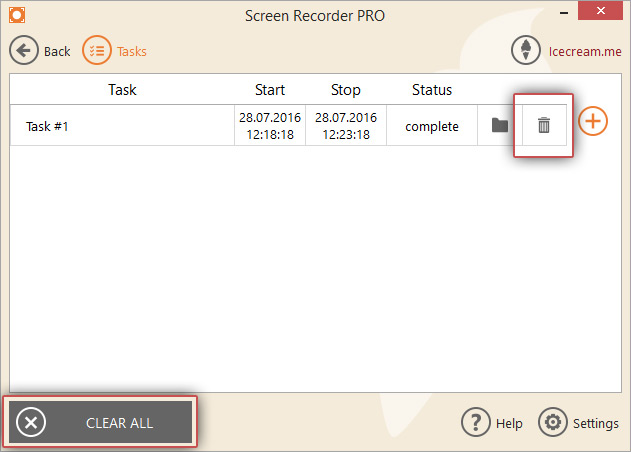
All the tasks to be recorded, tasks in progress and completed tasks are shown in the Tasks panel in the table view. You can delete each task by clicking the recycle bin icon corresponding the task. To delete all the tasks from the history (note that the video file won't be deleted from your PC, only the records about the tasks in the panel) press the “CLEAR ALL” button in the lower left hand corner of the panel.