 Plenty of modern smartphone users ditch all their devices like laptops, tablets, digital cameras, portable media players etc., as in the majority of cases, it is sufficient to have one smartphone to fulfill all types of daily tasks. One of the most popular smartphones is an iPhone. A lot of people tend to have the latest version of the iPhone and prefer to use it for multiple purposes. Storing images is definitely one such purpose. iPhones, as well as many other smartphones, have a specific screen resolution, and that’s why it’s great to have your images resized to fit that resolution. Below, you can find three-steps instructions on how to resize images for iPhone 7 Plus.
Step 1. Add a photo to resize it for iPhone 7 Plus
Start by adding the images for resizing to Icecream Image Resizer. Drag and drop the files into the program’s window to add them to the image queue.
Alternatively, you can click the “Add image to resize” button in the center of the program’s main window. The “Add image” button in the upper-left corner of the program does the same thing.
To add a whole folder of images, hit the “Add folder” button. This will open Windows Explorer as well.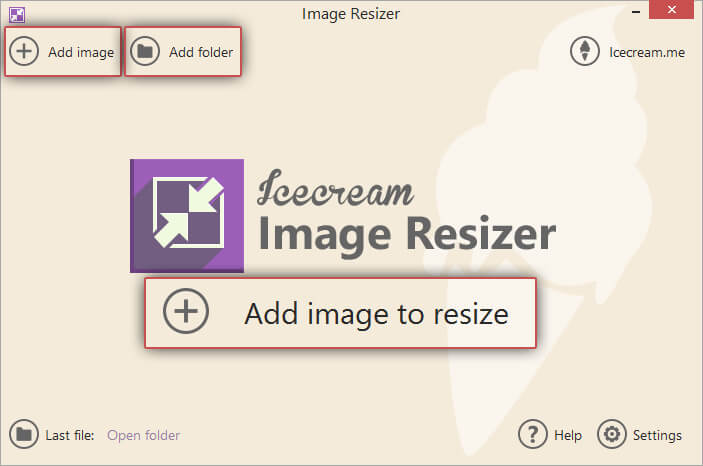
Step 2. Configure the resizing settings
After the images are added to the program, you need to customize the resizing settings. The resolution of the iPhone 7 Plus screen, along with the resolution of iPhone 6 Plus, is 1920×1080. You can select the “iPhone 6 Plus” option in the “Profiles” section of the program. Simply click within the rectangular area to the right of the “Profiles” title and select “iPhone 6 Plus” from the drop-down list to apply the 1920×1080 output image resolution.
Tick the “Keep original aspect ratio” option to preserve the initial width/height ratio of the files added to the program. The “Vertical images recognition” option will help you to automatically apply the right width and height values for the vertically oriented images.
Select the output folder for the resized images with the “Save to” option.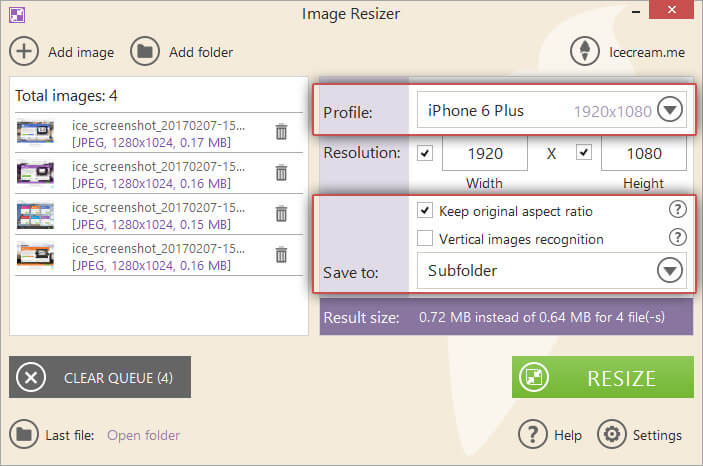
Step 3. Resize images for iPhone 7 Plus
The last step to resize images for iPhone 7 Plus is clicking the “RESIZE” button. As soon as the resizing is complete, there will be a pop-up notification window with an “Open folder” button. Click it to open the destination folder with the resized images.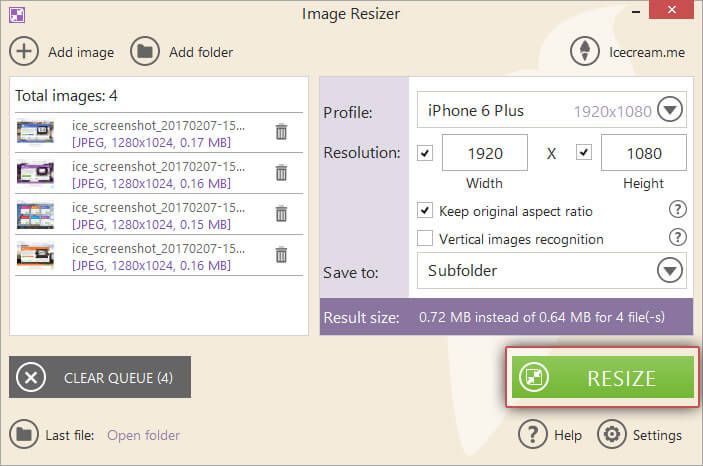
Resizing images can be done in three easy steps: add images, tweak the settings, and click the “RESIZE” button. You can read more about how to resize photos for Facebook covers on our blog.
This app is awesome