 One of the most frequently asked questions from our users is how to upload a video recorded with Icecream Screen Recorder to YouTube. The videos made with our program (both with Free and PRO versions) are perfectly compatible with this video sharing service. The whole process of screen capture and uploading videos to YouTube is really simple — you just need to know the right steps to take in order to complete this task. Follow the step-by-step guide below to learn how to record and share a video on YouTube.
Step 1. Select the recording mode and area
Click the “Capture video” button in the upper left-hand corner to select one of the five available recording modes of the program: Custom (your own custom recording resolution), Fullscreen, Last area (selection of the previously recorded area), Area auto detection (auto detection of an area to be recorded by the program), or Around mouse (recording an area of a certain size that will be moved around with the mouse cursor whenever it’s moving).
You may select the Custom recording mode right after you click the “Capture video” button in the middle of the program’s window.
You can customize the recording area through the program’s recording panel at any time before recording the video. Click the “Area” button to change the recording area resolution and/or location.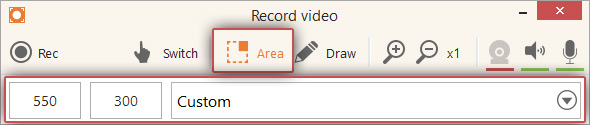
Step 2. Capture the video
As soon as the recording area is all set, click the “Rec” button on the recording panel to start the screen capture process.
To add graphics to your video, click the “Draw” button to open the drawing panel. Click the “Switch” button to switch control from the program to your computer.
Click the magnifying glass icons to zoom in or out of the selected recording area (unless you’re recording in “Around mouse” mode).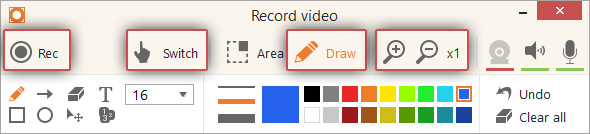
Click the “Pause” button to pause the current recording. Click the “Resume” button to continue on the screen capture process.
Step 3. Save the video
To finish the recording and save the video, click the “Stop” button on the recording panel.
Right after that you’ll see a pop-up notification in the lower right-hand corner of your desktop (unless you disabled the “Show notification” option in the program’s Settings). Click the folder icon or the file’s path on this notification to open the folder containing the recorded video.
Also, when the video is recorded, the program’s main window will be shown on the History panel. You may click the folder icon next to the video in the “Path” column to open its destination folder.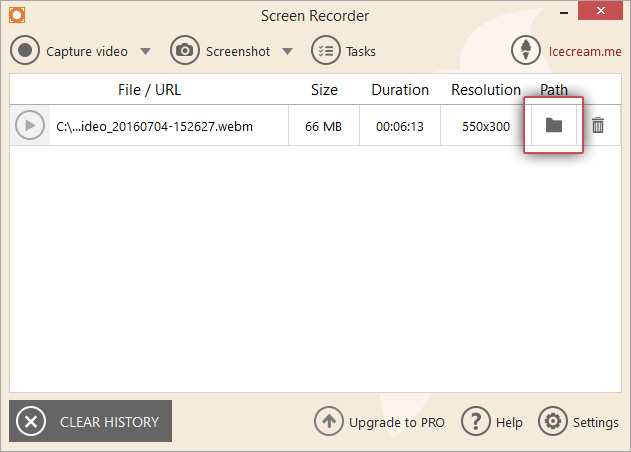
Step 4. Log into your YouTube account
Go to YouTube’s main page and click the “Sign in” button in the upper right-hand corner. Enter your email address and password to log into your YouTube account.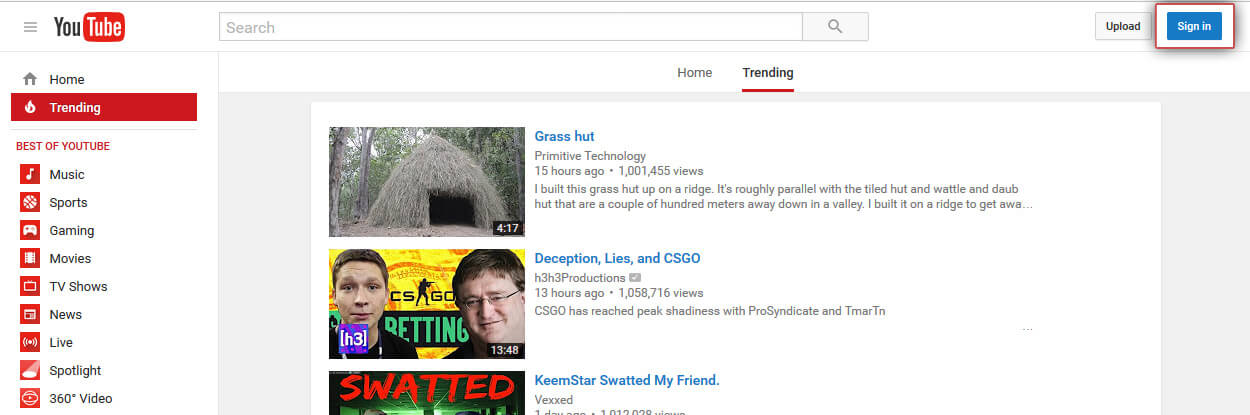
Step 5. Click the “Upload” button
Click the “Upload” button in the upper right-hand corner to proceed with uploading the video to YouTube.
Step 6. Upload the video and edit its info
Click the arrow button to open Windows Explorer and browse for the video file. Alternatively, you can drag and drop the file into the video uploading area.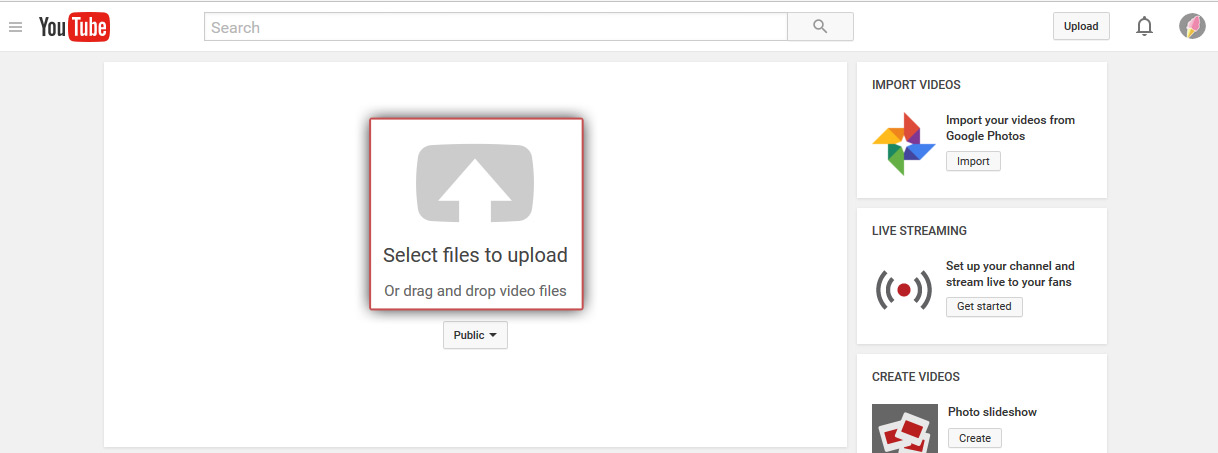
Enter the video title and add a description and tags.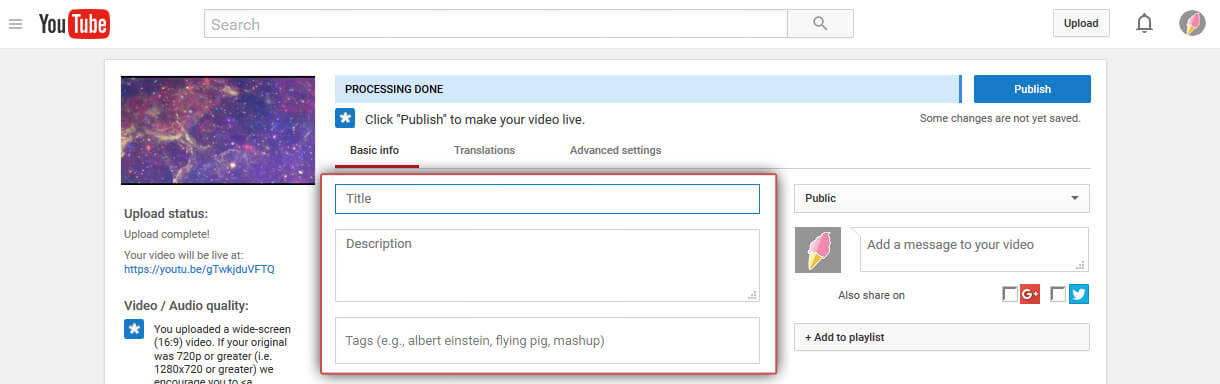
Step 7. Click the “Publish” button
Click the blue “Publish” button in the upper right-hand corner to publish your video on YouTube.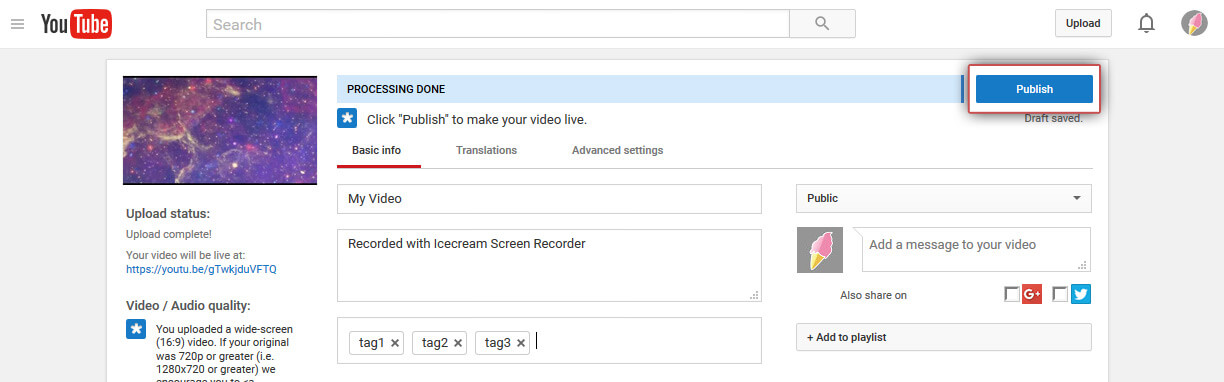
Now you know how to easily record videos with Icecream Screen Recorder and upload them to YouTube. You can also read more on how to create a slideshow with Icecream Slideshow Maker and share a slideshow on YouTube.