How to Add Music to a Video
Creating videos dedicated to various important events and parties has become very popular. You can combine multiple videos recorded on different devices from different angles and add background audio to create a memorable video. If you don't know how to add music to a video, you've come to the right place. Icecream Video Editor is a free video editing software that can easily add music to video. Familiarize yourself with the guide below.
Install and run Icecream Video Editor
The process starts with downloading the Icecream Video Editor. Download the setup file from the official website. Double-click it to initiate the installation process. Read and accept the License Agreement and follow the steps given during the setup process. Open the video editing software after it is successfully installed to add audio to your video.
Add video to timeline
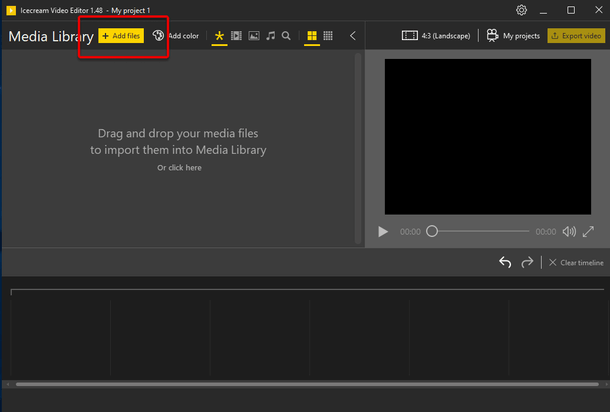
Click the "+Add files" button to open Windows Explorer on your computer to browse for the files. Another way to add video files (photo files are also supported) to the free video editor is to drag and drop the files into the program's window. The videos' thumbnails will appear in the "Media Library" section after their successful addition.
You will need to combine videos and photos and add the music soundtrack on a timeline. So, drag and drop the video content to the timeline located at the bottom of the program window. This can be also done by right-clicking the video's thumbnail. Select the "Add file to timeline" option from the opened context menu.
Add as many videos and photos to the timeline as you need in your desired order.
Add a music/audio file to the timeline and define the audio settings
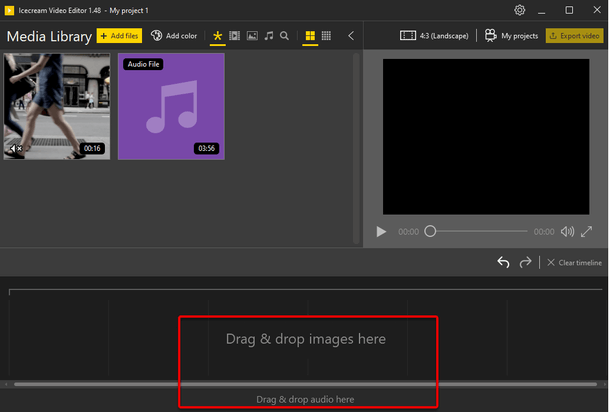
Add your audio file (MP3, for instance) to the Media Library of the video editor in the same way as the videos (drag and drop or use the "Add files" button).
The audio timeline is located right under the video timeline. Add the audio file to the audio timeline in a similar way to adding the video described in the previous step.
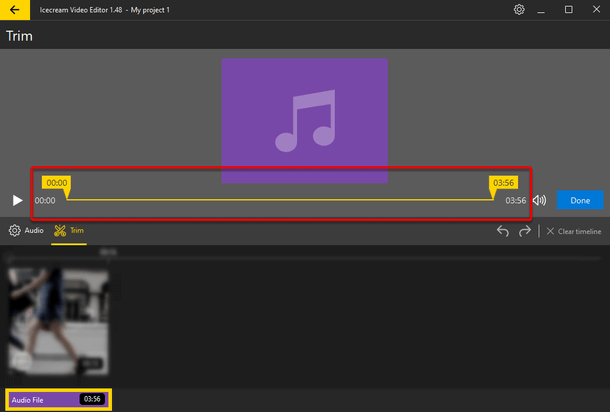
When the audio track is selected, click the "Trim" button above the timelines to trim the audio if needed.
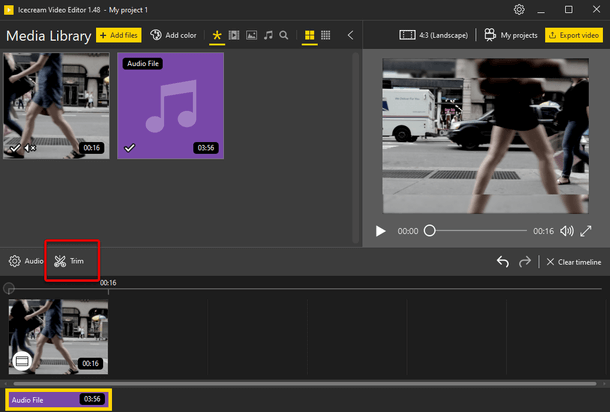
Move the yellow markers to set new timings for the beginning and the end of the audio track. Click the "Done" button to save the changes.
When the audio track is selected, click the "Audio" button above the timeline to open the audio settings panel. Set the volume level and fade-in and fade-out effect length and apply one of the available audio effects (Chipmunk, Echo, Chorus, or Robot Voice). The "Loop audio" option offers the feature to continuously repeat the audio file throughout the whole video file playback. Click "Done" to apply the changes to the audio file.
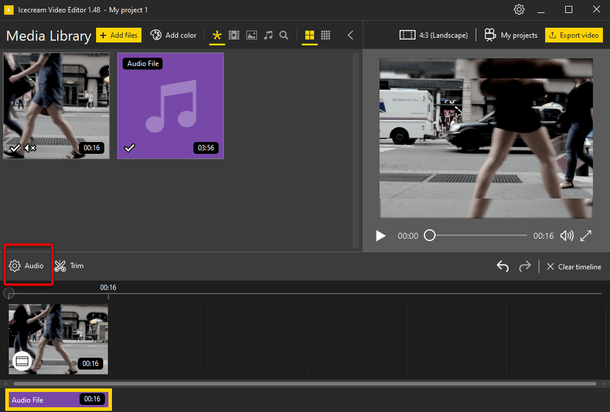
The last thing to be done to add music to video is to click the file on the video timeline and click the "Audio" button above it to open the native audio settings of the video. There are two important options:
“Keep original audio” – Uncheck this option if you want to turn OFF the original sound of the video.
“Adjust original audio to soundtrack added” – This is a very useful option if you want to automatically lower the volume of the soundtrack when there is speech or other action in the video.
Preview the final video during all the steps in the preview player in the right-hand side of the window of the video editor.

Export your video with added music
Finally, you need to save the changes to add music to your video. Click the “Export video” button that can be found in the upper right-hand corner of the window to start the process of creating a new video.

Apply a new file name and select the destination folder, output video format (MP4 or WebM), video resolution, and quality.
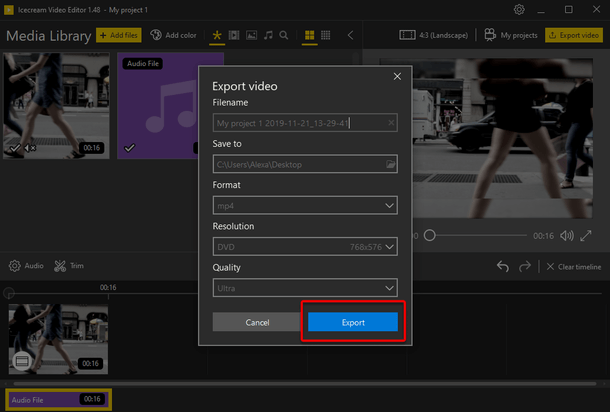
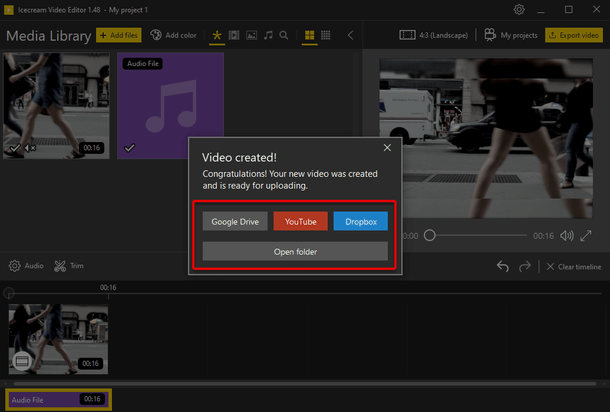
After the video is created you can open the folder with the file or upload it directly to YouTube, Google Drive, and Dropbox.
