How to Merge Videos in Windows 10, 11
Today, in the age of digital technology, few people have not ever been involved in video recording. Almost every person has a smartphone, which allows you to make high-quality videos.
In this article, we will show you how to merge videos in Windows 10. This can come in handy for creating cool video reviews or composing holiday content.
How We Picked the Video Mergers?
We wanted to ensure that you have the optimal resources to merge videos on Windows. So, we scoured the Internet and looked at the top rated options for merging video files.
When choosing a video splicer, we had to consider its ease of use, the number of features it offers, and its price. We tested each tool against our criteria and evaluated how well they performed.
Finally, we narrowed down our list to the 5 best tools available to combine videos on Windows. These 5 tools are easy to use, have excellent output quality, and support multiple video formats. We highly recommend them for anyone who needs to assemble videos in Windows.
Method 1. Icecream Video Editor
To start merging videos, you need to download a free video editor to your computer. Then install and run the program and follow the instructions below.
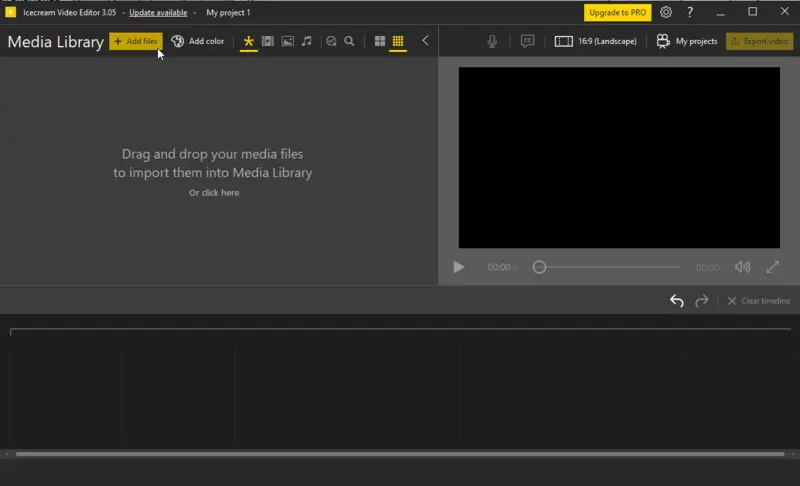
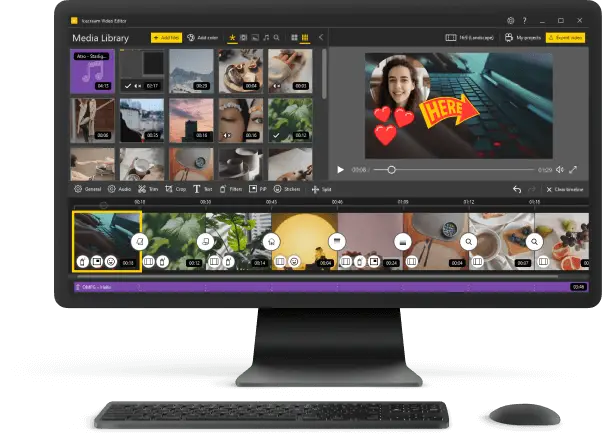
- To merge videos, click the "Add Files" button to add them to the Media Library. You can add images and audio files if you plan to add music to video, too.
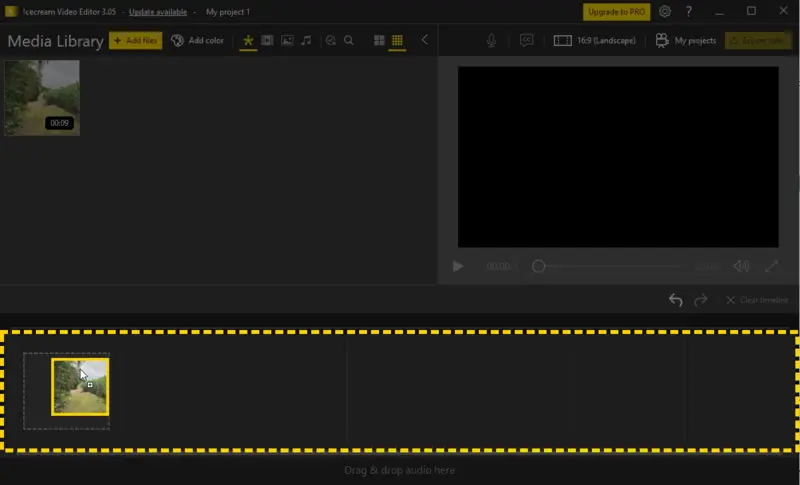
- Now drag and drop the files into the timeline. Rearrange or duplicate them if needed.
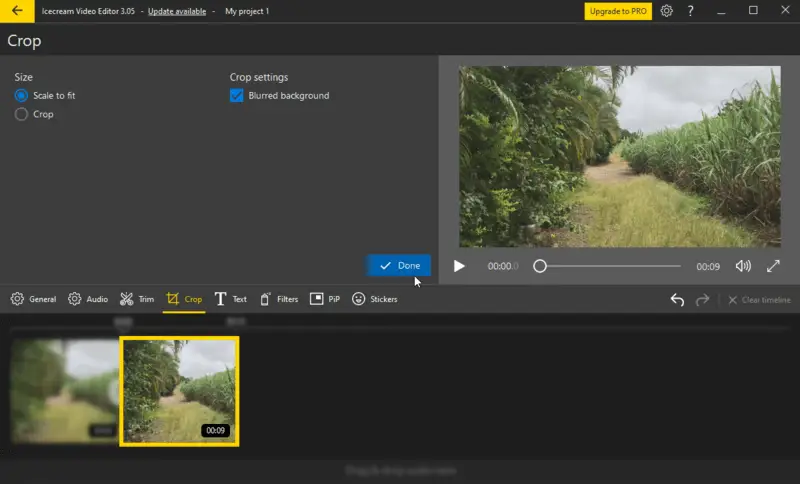
- Set the transition effects, trim videos, crop or speed up them, add text or stickers, or select the aspect ratio. The last function is useful for editing videos for specific purposes, e.g. posting to social media.
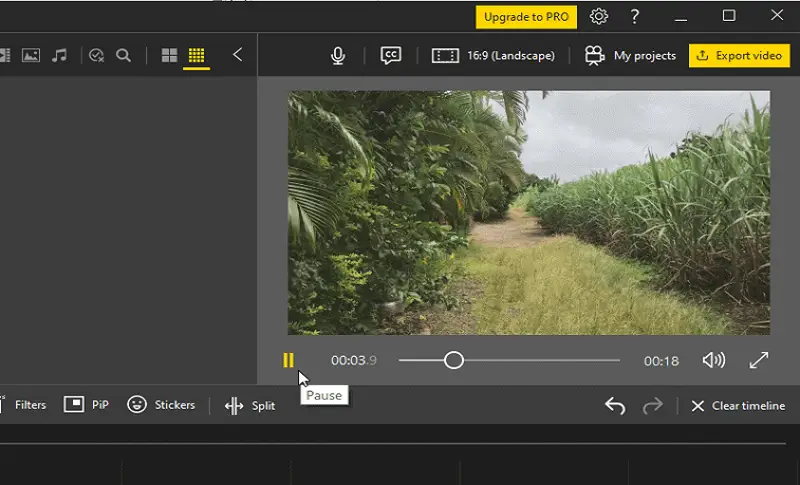
- Preview the project in the video player before you put videos together.
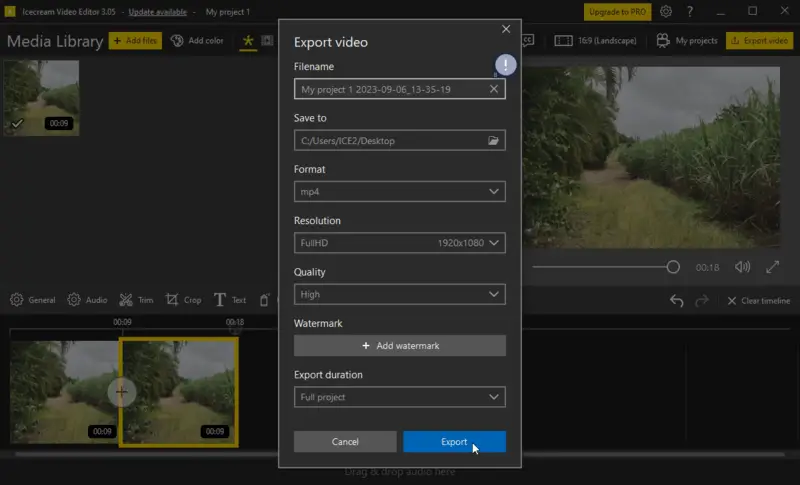
- If everything looks good, tap the "Export Files" button. This will combine videos on the timeline and will create a new file.
Advantages of Icecream Video Editor:
- Wide functionality with flexible settings that both beginners and professionals can benefit from;
- Internet connection is not required, so you can merge videos together anywhere you have a PC;
- Video editor with amazing intuitive design;
- Full set of tools to create polished projects.
Method 2. Windows Movie Maker
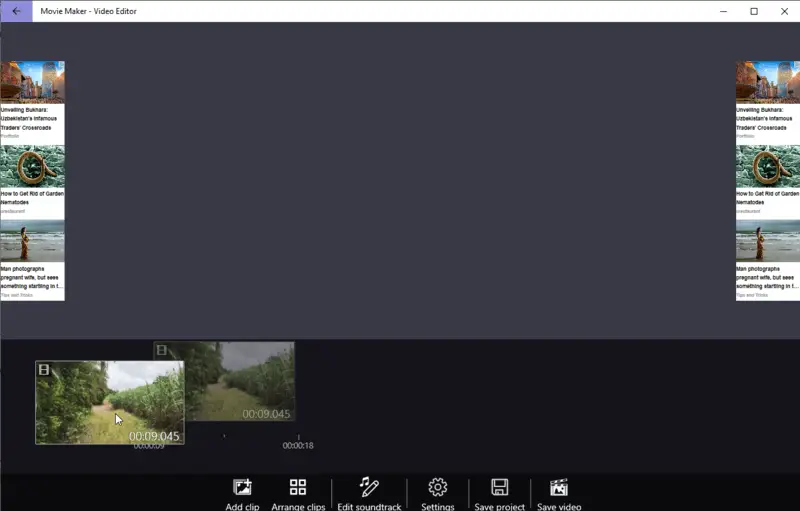
Many users are not even aware that Windows already has a built-in editor for merging multiple videos into one file. Windows Movie Maker allows you to combine, crop videos, add pictures, and more. To know how to combine videos on Windows with it, follow the instructions.
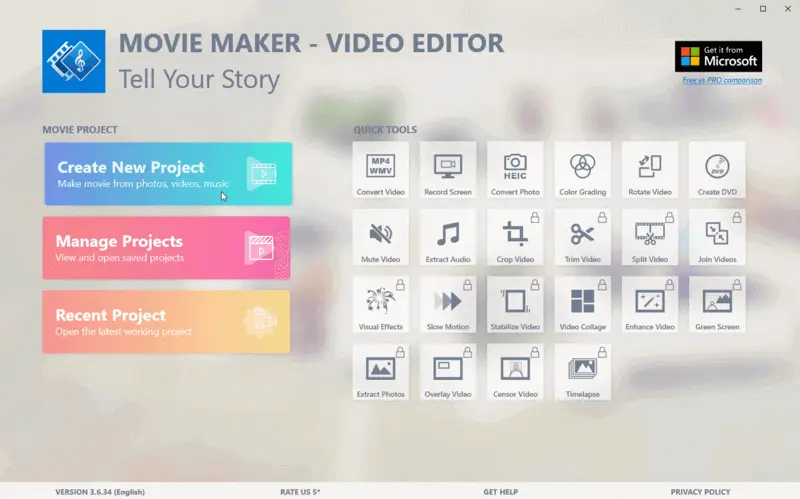
- Launch Windows Movie Maker. If for some reason it is not installed on your PC, you should download it from the Microsoft store.
- Click the "Create New Project" button.
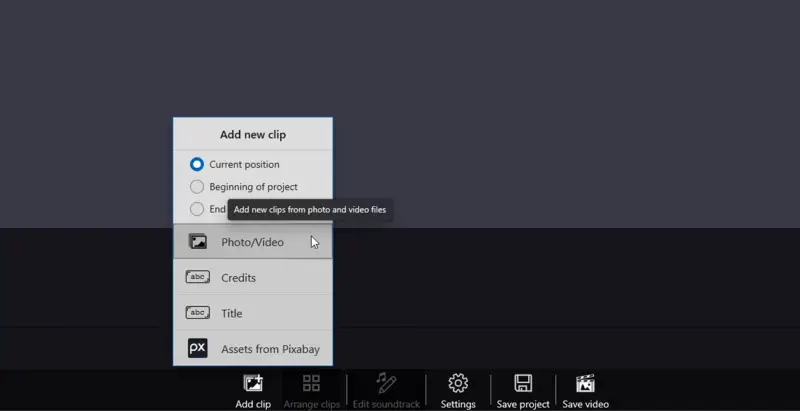
- Next, use Explorer to select the files. Once uploaded, they will be added to the timeline. At this stage, you can change their sequence.
- To merge videos, press the "Save Video" button and specify the location where the final file will be created.
Pros:
- Video merger and editor with user-friendly interface;
- Quick operation and conversion;
- Requires no internet connection;
- Is compatible with the majority of Windows OS versions.
Cons:
- Requires a paid license for extended features;
- While splicing videos can occasionally freeze and crash.
Method 3. Photos App
Merging videos can be a great method of creating your own unique video projects. With the pre-installed Microsoft Photos app in Windows 11 and 10, it's a breeze to stitch videos together and share them with friends and family. Here are the steps to do that:
- Open the application.
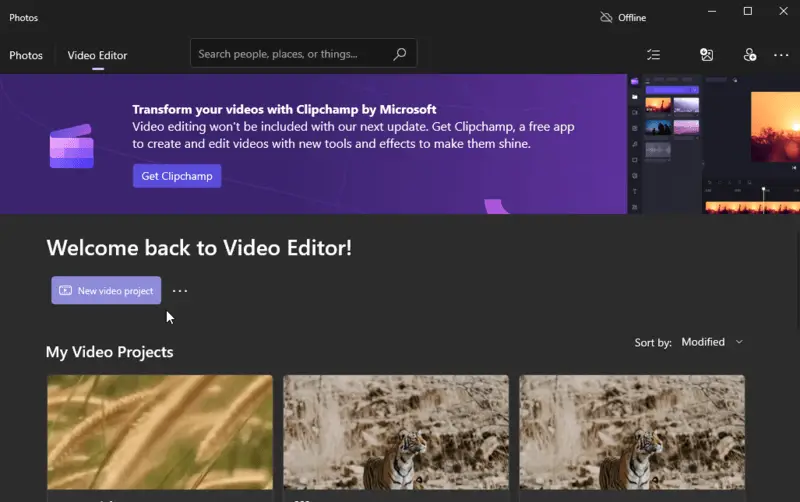
- Click on "Video Editor". Select "New Video Project" from the list.
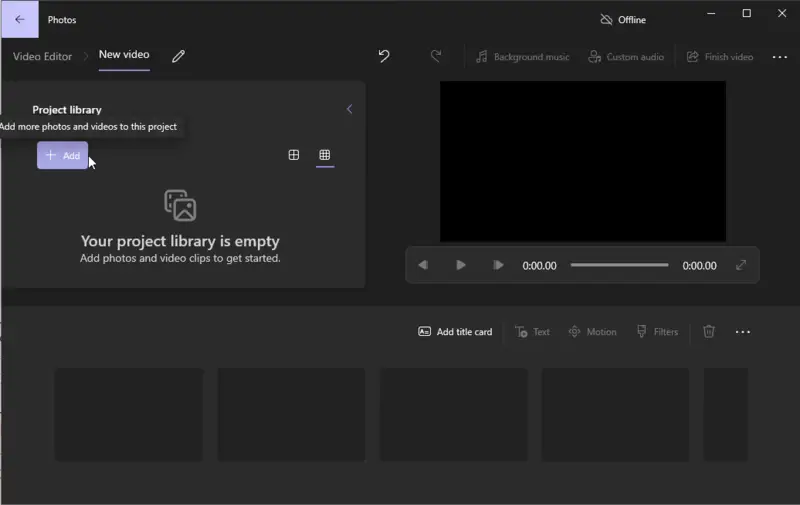
- Choose the new video name and tap the "Add" button to load the videos.
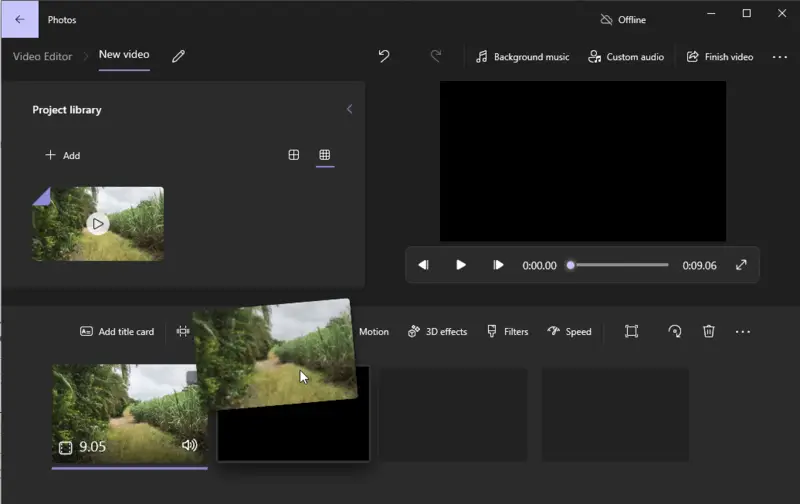
- Drop the files or hit "Place in storyboard". Adjust the settings.
- Click "Finish video" > "Export".
Pros:
- Convenient file upload from Library;
- You don't need any additional software or tools to merge videos;
- No format compatibility issues;
- OneDrive integration is available.
Cons:
- It may not be suitable for complex combining videos tasks;
- It doesn't have all the features available in other video merging programs;
- No audio controls.
Method 4. VLC Media Player
VLC Media Player is a user-friendly tool that can accommodate both introductory and professional video editing tasks. With it you can record screen, convert video files and remove audio. We will clarify the steps for putting videos together in Windows 11 or 10 and analyze the merits and demerits of VLC.
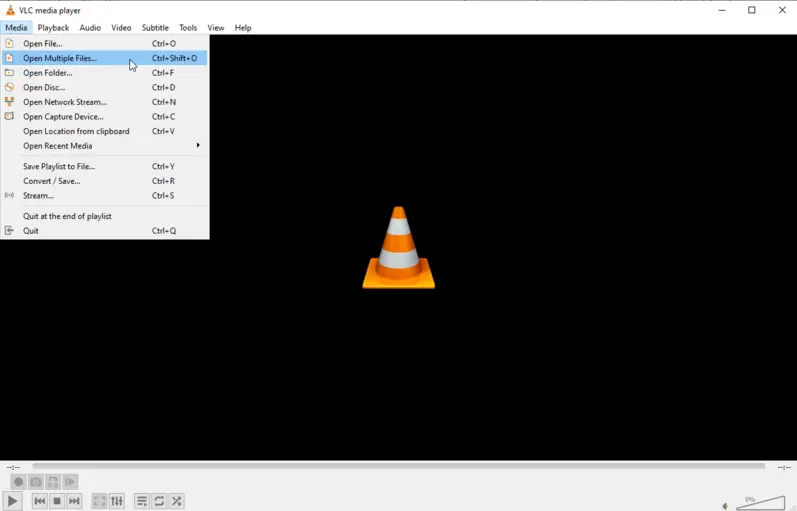
- Launch Media Player. Go to "Media" > "Open Multiple Files" from the menu.
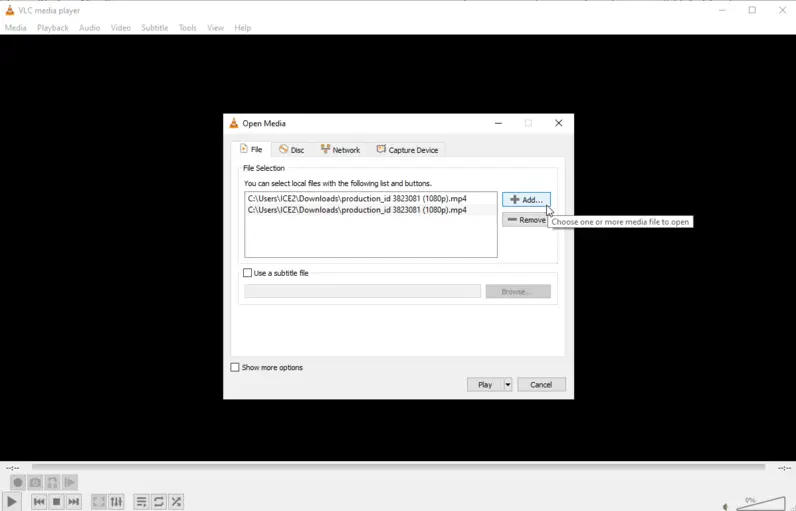
- Click "Add" and choose the video files you intend to join. You can add multiple files at once by holding down the "Ctrl" key while selecting.
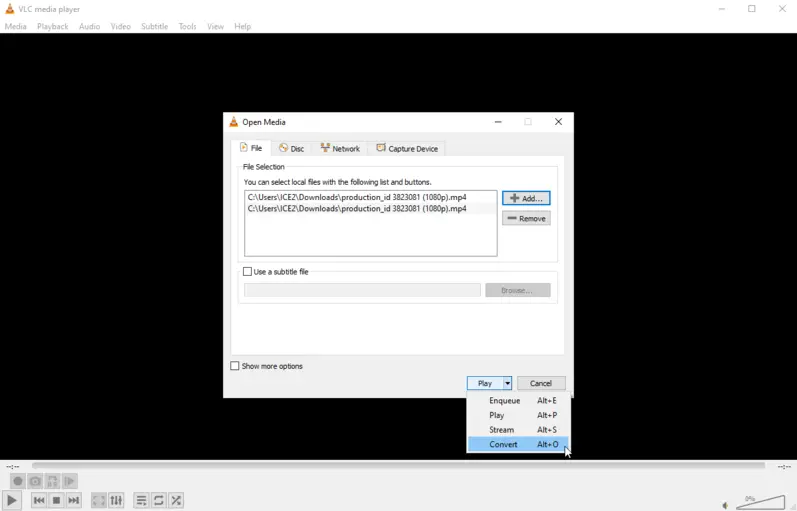
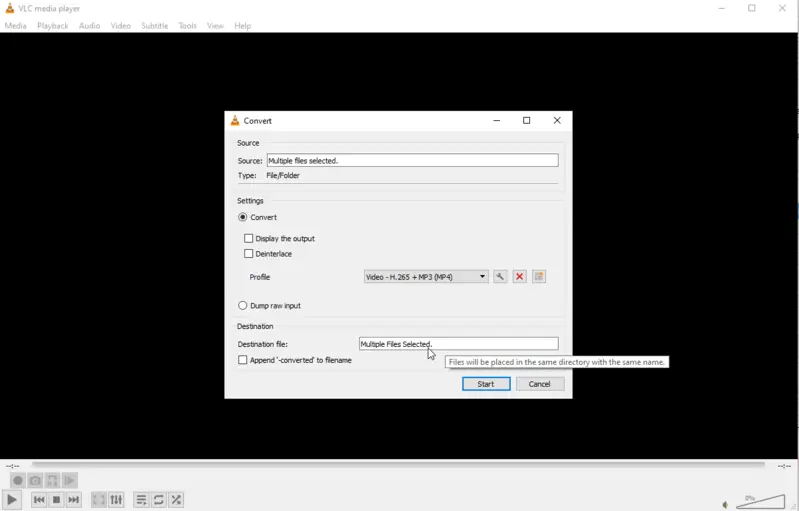
- When your files are added, click "Convert".
- In the next window specify the output file path and name.
- Finally, click on the "Start" button to begin joining videos in Windows 10.
Pros:
- Wide range of options for customization;
- Compatibility with almost all kinds of file formats.
Cons:
- Issues with audio synchronization;
- You can merge videos only of the same format;
- Low audio quality of the resulting file.
Method 5. Adobe Premiere Pro
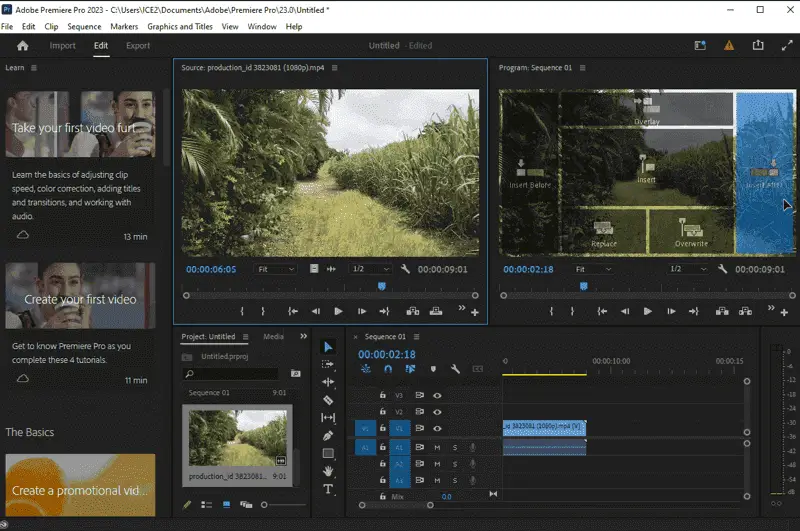
Adobe Premiere Pro is an exceptional video editing software for those with Windows 10 and 11. This software to merge videos is straightforward to work with and has many powerful features, including the ability to stitch videos together. Here's how to do it:
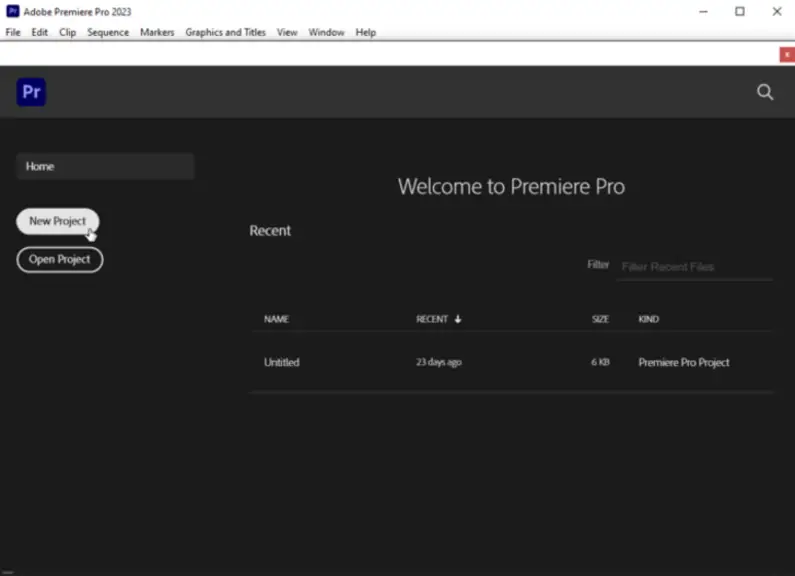
- Launch Premiere Pro and create a new project.
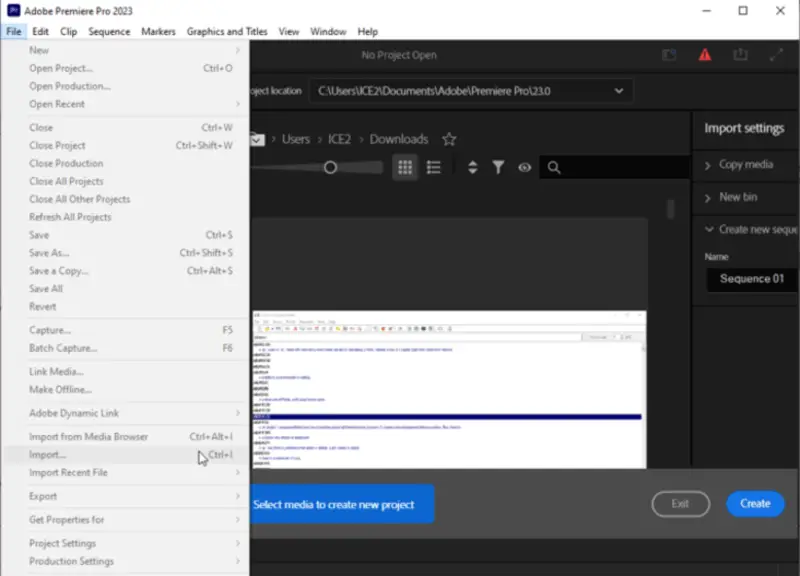
- To add a new video, go to "File" > "Import".
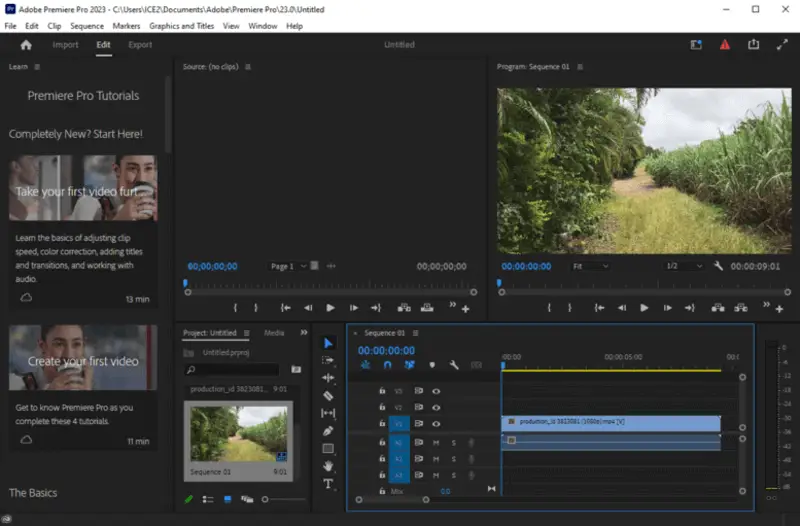
- Pick the video you desire to combine with your current one and drag it onto the timeline.
- Move the timeline cursor to where you want the two videos to combine.
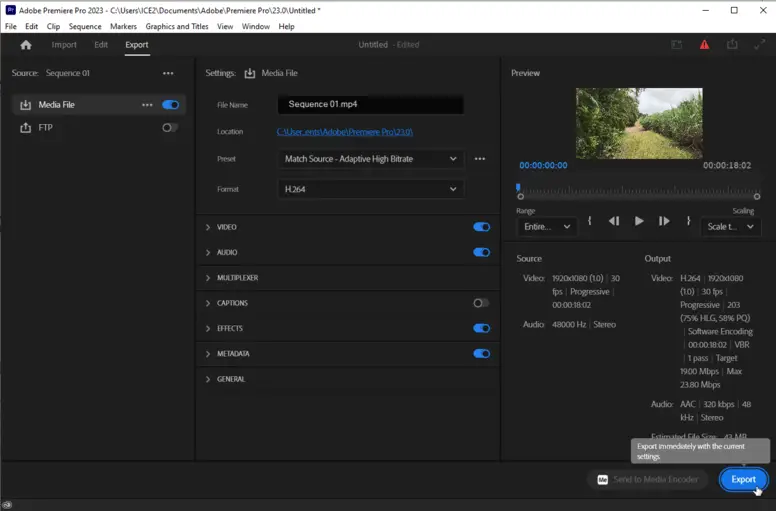
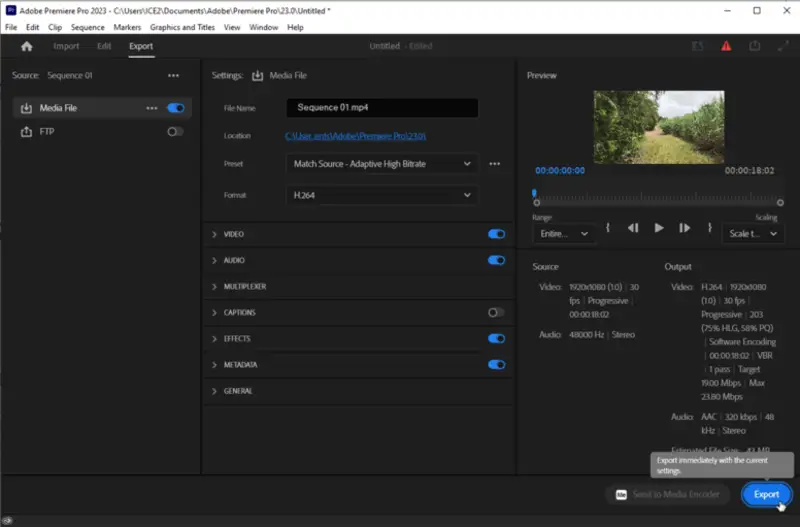
- Right-click on videos and select "Export".
- Specify the name and hit "OK".
Pros:
- Suitable for professional usage: create titles, change video speed and more;
- Video merger supports multiple formats, so you can mix and join video files of different types;
- Bunch of tutorials available online that can offer assistance.
Cons:
- It is relatively expensive video combiner compared to rival video editing applications;
- The interface is a bit overwhelming due to its complexity;
- Real-time editing capabilities can be slow on older computers or laptops.
Reasons to Merge Videos
Joining various videos into a single clip is an effective way to make a polished and engaging video. Whether you're a YouTuber, vlogger, or just someone who enjoys making videos, merging them together can improve a video.
- Not only does it help you create a smoother and professional-looking video, but it also saves time when editing. Uniting numerous videos eliminates the need for multiple takes and editing each one separately. This allows you to create the perfect video in a shorter amount of time.
- In addition, splicing videos can also build a more cohesive story. If you have several visuals that are related to each other, merging them into a single video will help your viewers understand the full story. It will make it easier for them to follow along and stay engaged with your content.
- Ultimately, combining videos into one can likewise be beneficial in conserving space on your PC. When you have many separate elements connected, they won't take up as much disk space as if those were individual documents.
So if you're looking how to edit video and save time while doing so, merging multiple videos is definitely the way to go!
How to Splice Videos Together: FAQ
- Can I unite videos from different formats?
- Yes, our video editing program gives you the capability to merge videos of disparate types into a single file.
- How do I save the merged video?
- After you have finished combining videos into one, you can keep it on the computer or another storage device in the specified format.
- What is the best format for combining videos?
- It depends on what you want to do with the video; however, common formats include MP4, AVI, and WMV.
- Can I add effects when putting videos together?
- Yes, the majority of editing software allows you to combine effects such as transitions and text overlays when blending videos.
- How do I preview my merged video?
- A large number of video editing tools have a preview feature that allows you to view the merged file before saving it.
How to Combine Videos: Tips
| Tip | Description |
|---|---|
| Find the videos. | Verify you have all the videos you'd like to merge saved in the same folder. |
| Organize them. | Rename each video in a way that simplifies tracking the order in which they should be merged. |
| Launch a free video merger. | Download video editor to join video files. |
| Import the videos. | Open your video editor and incorporate the videos you plan to amalgamate by dragging them into the timeline. |
| Arrange the files. | Position the videos in the timeline, divining they are arranged as desired. |
| Add transitions. | If desired, add some transitions between your clips or audio to make them blend together more smoothly. |
| Preview and export. | Examine your merged video and check it looks how you want it to before exporting it as a new file. |
| Share with friends. | Once you've successfully combined your videos, send them to friends through email, social media, or messaging apps. |
| Save. | Before you close out of your project, make certain to store it so that you can access it and bring changes if needed later on down the line. |
| Compress for mobile viewing. | To ensure your video looks great when viewed on a mobile device, compress it. |
How to Merge Videos in Windows 10: Final Words
Today we shared several free and quick methods to combine videos in a hassle-free way. This can be useful for bloggers who want to publish content for their channels, for administrators to give detailed instructions to their employees, for designers creating promotional videos, and for other users whose business is related to video content.
By taking the time to understand how to properly merge videos on Windows, you can create stunning visuals with ease. With just a few clicks, you can produce vibrant video projects that are sure to impress your viewers.

